Difference between revisions of "Maps"
Jump to navigation
Jump to search
| (10 intermediate revisions by 4 users not shown) | |||
| Line 29: | Line 29: | ||
|Silent Wood | |Silent Wood | ||
|https://www.hbolympia.com/img/maps/SWmap.png | |https://www.hbolympia.com/img/maps/SWmap.png | ||
| + | |60 - 140 | ||
| + | |- | ||
| + | |Death Valley | ||
| + | |https://www.hbolympia.com/img/maps/DVmap.png | ||
|50 - 140 | |50 - 140 | ||
|} | |} | ||
| Line 60: | Line 64: | ||
|20 - 140 | |20 - 140 | ||
|- | |- | ||
| − | |Death Valley | + | |Elv. Death Valley |
|https://www.hbolympia.com/img/maps/DVmap.png | |https://www.hbolympia.com/img/maps/DVmap.png | ||
|50 - 140 | |50 - 140 | ||
| + | |- | ||
| + | |Elv. Silent Wood | ||
| + | |https://www.hbolympia.com/img/maps/SWmap.png | ||
| + | |60 - 140 | ||
|} | |} | ||
| Line 79: | Line 87: | ||
|Dungeon L2 | |Dungeon L2 | ||
|https://www.hbolympia.com/img/maps/Dglv2.png | |https://www.hbolympia.com/img/maps/Dglv2.png | ||
| − | | | + | |70+ |
|- | |- | ||
|Dungeon L3 | |Dungeon L3 | ||
|https://www.hbolympia.com/img/maps/Dglv3.png | |https://www.hbolympia.com/img/maps/Dglv3.png | ||
| − | | | + | |80+ |
|- | |- | ||
|Dungeon L4 | |Dungeon L4 | ||
|https://www.hbolympia.com/img/maps/Dglv4.png | |https://www.hbolympia.com/img/maps/Dglv4.png | ||
| − | | | + | |90+ |
|- | |- | ||
|Promise Land | |Promise Land | ||
| Line 99: | Line 107: | ||
|Middleland Mine | |Middleland Mine | ||
|https://www.helbreath.net/img/maps/MLM.png | |https://www.helbreath.net/img/maps/MLM.png | ||
| − | | | + | |110+ |
|- | |- | ||
|Tower of Hell L1 | |Tower of Hell L1 | ||
|https://www.helbreath.net/img/maps/Toh1.png | |https://www.helbreath.net/img/maps/Toh1.png | ||
| − | | | + | |120+ |
|- | |- | ||
| − | |Tower of Hell | + | |Tower of Hell L2 |
|https://www.helbreath.net/img/maps/Toh2.png | |https://www.helbreath.net/img/maps/Toh2.png | ||
| − | | | + | |130+ |
|- | |- | ||
|Tower of Hell L3 | |Tower of Hell L3 | ||
|https://www.helbreath.net/img/maps/Toh3.png | |https://www.helbreath.net/img/maps/Toh3.png | ||
| − | | | + | |140+ |
| + | |- | ||
| + | |Icebound | ||
| + | |https://www.helbreath.net/img/maps/Icebound.png | ||
| + | |110+ | ||
|} | |} | ||
='''Gateways of Apocalypse'''= | ='''Gateways of Apocalypse'''= | ||
| − | |||
| − | Infernia A | + | {| class="wikitable" |
| − | + | |- | |
| − | Infernia B | + | |Name |
| − | + | |Image | |
| − | Maze | + | |Level Limit |
| − | + | |- | |
| − | Procella | + | |Drucnian City |
| − | + | | https://www.hbolympia.com/img/maps/Druncncity.png | |
| − | Abaddon | + | |110 - 140 |
| + | |- | ||
| + | |Infernia A | ||
| + | |https://www.hbolympia.com/img/maps/Infa.png | ||
| + | |140 | ||
| + | |- | ||
| + | |Infernia B | ||
| + | |https://www.hbolympia.com/img/maps/Infb.png | ||
| + | |140 | ||
| + | |- | ||
| + | |Maze | ||
| + | |https://www.hbolympia.com/img/maps/Maze.png | ||
| + | |140 | ||
| + | |- | ||
| + | |Procella | ||
| + | |https://www.hbolympia.com/img/maps/Procella.png | ||
| + | |140 | ||
| + | |- | ||
| + | |Abaddon | ||
| + | |https://www.hbolympia.com/img/maps/Abaddon%28map%29.png | ||
| + | |140 | ||
| + | |} | ||
Latest revision as of 06:51, 28 February 2023
Maps of Aresden[edit]
| Name | Image | Level Limit |
| Farm | 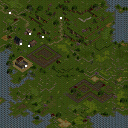
|
0 - 120 |
| City | 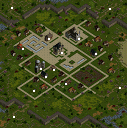
|
|
| Dungeon | 
|
60 - 140 |
| Eternal Field | 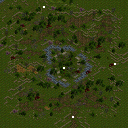
|
20 - 140 |
| Garden | 
|
20 - 140 |
| Silent Wood | 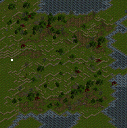
|
60 - 140 |
| Death Valley | 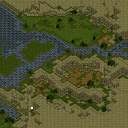
|
50 - 140 |
Maps of Elvine[edit]
| Name | Image | Level Limit |
| Farm | 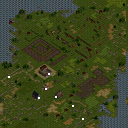
|
0 - 120 |
| City | 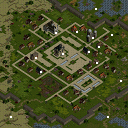
|
|
| Dungeon | 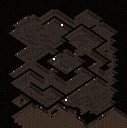
|
60 - 140 |
| Rocky Highland | 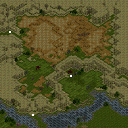
|
20 - 140 |
| Garden | 
|
20 - 140 |
| Elv. Death Valley |
|
50 - 140 |
| Elv. Silent Wood |
|
60 - 140 |
World Maps[edit]
| Name | Image | Level Limit |
| Farm Dungeon | 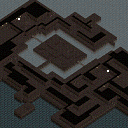
|
15 - 60 |
| Dungeon L2 | 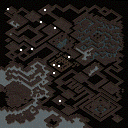
|
70+ |
| Dungeon L3 | 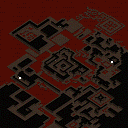
|
80+ |
| Dungeon L4 | 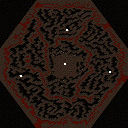
|
90+ |
| Promise Land | 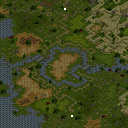
|
40 - 119 |
| Middleland | 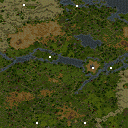
|
110 - 140 |
| Middleland Mine | 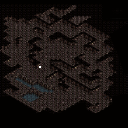
|
110+ |
| Tower of Hell L1 | 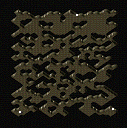
|
120+ |
| Tower of Hell L2 | 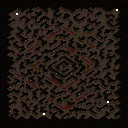
|
130+ |
| Tower of Hell L3 | 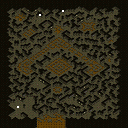
|
140+ |
| Icebound | 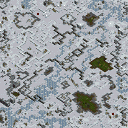
|
110+ |
Gateways of Apocalypse[edit]
| Name | Image | Level Limit |
| Drucnian City | 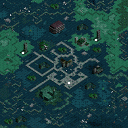
|
110 - 140 |
| Infernia A | 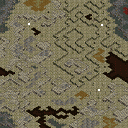
|
140 |
| Infernia B | 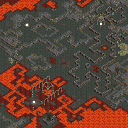
|
140 |
| Maze | 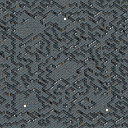
|
140 |
| Procella | 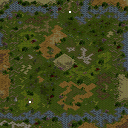
|
140 |
| Abaddon | 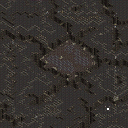
|
140 |